Dwellness™ • Toileting
Toileting
Dwellness™ customization for:
Your Patient
General Principles
[NOTE: Before you undertake this routine, please study and practice the principles of Safe Body Dynamics for your patient’s transfers and ambulation.]
→ Breathe! Never hold your breath and bear down when exerting yourself ←
→ Stretching helps prevent injury… stretch before work, and stretch every day ←
→ Keep a low center of gravity during transferring or lifting ←
→ When not transferring or lifting, stand and walk fully erect with abdominals engaged ←
→ Think carefully about each move you make ←
→ Prompt your patient's movements, prepare, and wait for a response before moving yourself ←
→ When in doubt, pause and reconsider your next move ←
→ If your patient decides to go down to the floor, do not resist; gently lower your patient ←
Routines
[NOTE: Gloves can protect the person wearing them, but they are also meant to protect the person being served. Be acutely aware of any time your gloves might be contaminated by contact with biohazard. Once you know that your gloves have been contaminated, immediately change gloves.]
Voiding, standing at the toilet
[NOTE: Your patient is more likely to void standing at the toilet — not in your patient's briefs while sitting — when your patient is well rested, alert, and feeling good. He is less likely to void at the toilet when your patient's gut is uncomfortable (overdue BM or upset stomach), or when your patient is tired.]
- Prepare the bathroom
- Be sure the path to the bathroom is clear and safe
- Disinfect the toilet rim
- Check supplies
- Briefs, prepared for use
- Adequate supply of wipes
- Adequate supply of gloves within reach at all times
- Change of shirt and pants (or summer shorts)
- Prepare briefs for use
[NOTE: Use two briefs to help insure less leakage. To prepare the briefs for use, cut holes into the front of the white brief and place inside the grey brief. Cut the white briefs always over the waste basket, since there usually is some shedding of powder out of the cuts. The powder turns into little beads when it comes in contact with water, which tends to clog drains.]
[NOTE: About 10% of the time, your patient may have a neurological physical "stutter" with your patient's left foot. When your patient initiates your patient's left foot to step so he can stand up, your patient's left foot does a slight spasm and your patient can’t place it squarely on the floor. Your patient usually moves it back in place under your patient, and immediately tries again. The second time almost always works well and your patient stands up. This does not change anything you should do, except keep a steady hold and encourage your patient to try again.]
- Navigate into the bathroom and up to the toilet
- Stand behind your patient, with your patient's knees close to the toilet rim
- Pull down your patient's pants or summer shorts and briefs, just past your patient's knees
- Keep your patient's arms by your patient's sides so your patient does reach in front
- Show your patient a deep breath, which encourages relaxation
- If your patient says "All done.", then stop the process
- Back away from the toilet and face the sink
- Allow your patient to hold onto the sink
- Pull up your patient's briefs and pants (or summer shorts)
→ CAUTION: NEVER MOVE AWAY FROM YOUR PATIENT IN THE BATHROOM. NEVER LEAVE YOUR PATIENT ALONE IN THE BATHROOM. ←
→ CAUTION: When your patient is standing in the bathroom, always stand close enough to protect your patient from falling. If you have to reach for something or move sideways, then always keep at least one hand behind your patient. ←
[NOTE: For your patient's comfort, be sure your patient's genitals are in front, not tucked downward or between your patient's thighs.]
[NOTE: There are different ways to judge if it’s time to have a BM. To avoid a pattern of frustration, get to know your patient's expressions and the timing of your patient's BMs.]
- How to tell if it’s time for a BM
- Interval since the last BM
- Your patient's communication of the need for a BM, which can be
- Body language indicating gut discomfort
- Unusually excessive hand chewing
- Resistance to sitting in a chair
- Smell of gas
- BM deposits in your patient's brief
- Prepare the bathroom
- Be sure the path to the bathroom is clear and safe
- Check supplies
- Briefs, prepared for use
- Adequate supply of wipes
- Adequate supply of gloves within reach at all times
- Change of shirt and pants (or summer shorts)
- Prepare briefs for use
- Place extra gloves on top of the toilet tank for easy reach
[NOTE: Use two briefs to help insure less leakage. To prepare the briefs for use, cut holes into the front of the white brief and place inside the grey brief. Cut the white briefs always over the waste basket, since there usually is some shedding of powder out of the cuts. The powder turns into little beads when it comes in contact with water, which tends to clog drains.]
[NOTE: About 10% of the time, he may have a neurological physical "stutter" with your patient's left foot. When your patient initiates your patient's left foot to step so he can stand up, your patient's left foot does a slight spasm and your patient can’t place it squarely on the floor. Your patient usually moves it back in place under your patient, and immediately tries again. The second time almost always works well and your patient stands up. This does not change anything you should do, except keep a steady hold and encourage your patient to try again.]
- Navigate into the bathroom, and in front of the toilet
- Stand your patient in front of the toilet and pull down your patient's pants (or summer shorts) all the way
- Pull down the brief in back as far as possible, leaving the front in place
- This is in case of releasing some urine
- Seat your patient on the toilet — if you feel resistance, gently push on one side of the pelvis and ease down to sitting
- Be sure your patient is seated squarely on the BioBidet seat, with almost no gap in the back
- Tip your patient forward all the way
- Proceed according to the preferred method for stimulating a BM
- See note at the end of this section
- Sit your patient upright, offer full support, and encourage letting go
- If your patient says "All done." before having a BM, ask to wait and encourage your patient to try again
- If your patient seems uncomfortable or has an urgent voice, discontinue and try again later
- After your patient has a BM and says "All done.", listen carefully to the tone of voice
- An urgent voice may mean your patient still has some BM to go
- A relaxed voice usually indicates your patient really is done
- Wipe or wash and finish
- Tip your patient forward all the way and wipe with baby wipes
- Stand your patient up, swivel around, and hold onto the sink
- While your patient is holding onto the sink, pull up your patient's briefs and pants (or summer shorts)
→ CAUTION: ! DO NOT flush the baby wipes! Even if the wipes say "Flushable", do not flush any wipes; dispose of them in the waste basket. ←
→ CAUTION: NEVER MOVE AWAY FROM YOUR PATIENT IN THE BATHROOM. NEVER LEAVE YOUR PATIENT ALONE IN THE BATHROOM. ←
→ CAUTION: When your patient is standing in the bathroom, always stand close enough to protect your patient from falling. If you have to reach for something or move sideways, then always keep at least one hand behind your patient. ←
[NOTE: For your patient's comfort, be sure your patient's genitals are in front, not tucked downward or between your patient's thighs.]
[NOTE: One method to use as a stimulant for BM (preferred at this time) is to use a Glycerin suppository. Please note that the effect can take a few hours after placement. Refer to the information on the Glycerin suppository in the Medication Administration Routines]
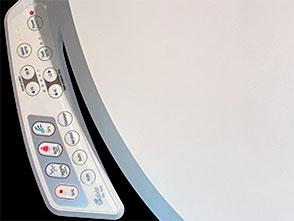
BioBidet[NOTE: One option to wiping after a BM on the toilet is to wash with the BioBidet. To date, your patient has enjoyed it, but always be aware of any signal of discomfort. If you hear, "All done.", then press the Stop button and finish with wipes.]
- Refer to the BioBidet User Manual (PDF)
- There is a Quick User Guide posted nest to the toilet
- Be sure your patient is seated squarely on the toilet, and there is almost no gap in the back
- When your patient is comfortable, press the "Cleansing" button
- Once you hear that washing has started, press the "Auto" button
- It helps to press the "Nozzle position" button toward the back to help it cover more wash area
- The nozzle position will automatically return to the middle position
- Wait for the Auto function to complete the drying process
- Use wipes to finish and touch up
[NOTE: Do not press the "ON/OFF" button on the BioBidet unless there is no light next to it. When the red light is showing, it means the unit is in "standby" mode for maintaining warm water in the tank and keeping the seat warm.]
Changing soiled briefs in the bathroom
[NOTE: The procedures for changing soiled briefs varies, depending on if the briefs are soiled by urine or BM.]
- Prepare the bathroom
- Be sure the path to the bathroom is clear and safe
- Check supplies
- Briefs, prepared for use
- Adequate supply of wipes
- Adequate supply of gloves within reach at all times
- Change of shirt and pants (or summer shorts)
- Prepare briefs for use
- If soiled by BM, place a chuck on the floor in the shower
- If soiled by BM, have a few chucks ready to help wipe
- Use The Safe Walk to go into the bathroom
- Navigate into the bathroom
- Position at the sink, with your patient holding on
- Stance and positioning for removing briefs, pants, or summer shorts
- Pull pants or summer shorts down to knee level
- To work on your patient's left side, place your right foot behind your patient's right foot
- Lunge to the left and reach your right arm around to the front of your patient's left leg
- Remove left pants or summer shorts leg
- To work on your patient's right side, place your left foot behind your patient's left foot
- Lunge to the right and reach your left arm around to the front of your patient's right leg
- Remove right pants or summer shorts leg
- Standing up straight in front of the sink, tear off your patient's briefs at the seams, and place them in the waste basket in the shower
- Apply a few drops of essential oils to three wipes before using — wipe thoroughly, especially body hair
- Stance and positioning for putting on fresh briefs and pants (or summer shorts)
- To work on your patient's left side, place your right foot behind your patient's right foot
- Lunge to the left and reach your right hand around to the front of your patient's left leg
- Place left side of the briefs, pants, or summer shorts on your patient's left leg
- To work on your patient's right side, place your left foot behind your patient's left foot
- Lunge to the right and reach your left arm around to the front of your patient's right leg
- Place right side of the briefs, pants, or summer shorts on your patient's right leg
[NOTE: Use two briefs to help insure less leakage. To prepare the briefs for use, cut holes into the front of the white brief and place inside the grey brief. Cut the white briefs always over the waste basket, since there usually is some shedding of powder out of the cuts. The powder turns into little beads when it comes in contact with water, which tends to clog drains.]
[NOTE: About 10% of the time, your patient may have a neurological physical "stutter" with your patient's left foot. When your patient initiates your patient's left foot to step so he can stand up, your patient's left foot does a slight spasm and your patient can’t place it squarely on the floor. Your patient usually moves it back in place under your patient, and immediately tries again. The second time almost always works well and your patient stands up. This does not change anything you should do, except keep a steady hold and encourage your patient to try again.]
→ CAUTION: NEVER MOVE AWAY FROM YOUR PATIENT IN THE BATHROOM. NEVER LEAVE YOUR PATIENT ALONE IN THE BATHROOM. ←
→ CAUTION: When your patient is standing in the bathroom, always stand close enough to protect your patient from falling. If you have to reach for something or move sideways, then always keep at least one hand behind your patient. ←
→ CAUTION: Use Safe Body Dynamics for all moves. ←
→ CAUTION: ! DO NOT flush the baby wipes ! Even if the wipes say "Flushable", do not flush any wipes; dispose of them in the waste basket. ←
- At times it would be hard to change your patient in the bathroom
- Often the following technique helps if your patient is very tired
- Procedure
- Get the briefs ready with three wipes (add essential oils)
- Place the wipes close to the chair, within reach
- Put your patient's legs into the briefs and pull them up around your patient's knees
- See "Getting your patient out of the Rifton Activity Chair"
- Unbuckle your patient and tear the seams of the soiled briefs while your patient is seated
- Stand your patient up and pull off the soiled briefs
- Wipe and pull up the fresh briefs
[NOTE: When your patient has diarrhea or very loose stool combined with excess gut pressure, sometimes your patient can let out BM into your patient's briefs while seated in a chair. This is a particular challenge to change your patient and clean your patient safely. Be patient and upbeat. Narrate the process to your patient cheerfully. Move carefully and purposefully to avoid discomfort or spreading biohazard.]
→ CAUTION: Gloves can protect the person wearing them, but they are also meant to protect the person being served. Be acutely aware of any time your gloves might be contaminated by contact with biohazard. Once you know that your gloves have been contaminated, immediately change gloves. Keep a good supply of fresh gloves close at hand. ←
- Prepare the bathroom
- Be sure the path to the bathroom is clear and safe
- Check supplies
- Briefs, prepared for use
- Adequate supply of wipes
- Adequate supply of gloves within reach at all times
- Change of shirt and pants (or summer shorts)
- Prepare briefs for use
- For the BM soiled briefs, place a chuck on the floor in the shower
- Have a few chucks ready to help wipe your patient, within reach standing at the sink
- Put the bottle of body wash on the sink, within reach when you’re at the toilet
- Put the blue plastic bowl within reach when you’re at the toilet
- Bunch up some toilet paper and place on the towel rack above the toilet tank
- Use The Safe Walk to go into the bathroom
- Navigate into the bathroom
- Position at the sink, with your patient holding on
- Procedure for dealing with a blow-out
- Tear off your patient's briefs at the seams and drop on the chuck in the shower
- Notice if the briefs are filled with urine also — this affects Step 3
- Wipe your patient with a chuck, reaching as far underneath as possible, and drop the soiled chuck on the chuck in the shower
- This is just to get the bulk of the stool off, not complete
- Like you’ll have to change gloves after this step
- If there was no urine in the briefs, put a gray brief on your patient, pull down the brief in back as far as possible, leaving the front in place
- Seat your patient on the toilet — if your patient resists, gently push on one side of your patient's pelvis to ease your patient down to sitting
- Kneel down next to your patient and bend your patient forward
- Fill the blue plastic bowl with warm water and pour water on your patient's rear
- Apply the soap with your left hand, leaving the right hand clean to handle the soap bottle and other things
- Rinse with as many bowls of warm water as necessary — reach under as far as possible
- Wipe with bunched up toilet paper and throw it in the waste basket
- It may clog the toilet
- Stand your patient up, swivel around, and hold onto the sink
[NOTE: Use two briefs to help insure less leakage. To prepare the briefs for use, cut holes into the front of the white brief and place inside the grey brief. Cut the white briefs always over the waste basket, since there usually is some shedding of powder out of the cuts. The powder turns into little beads when it comes in contact with water, which tends to clog drains.]
[NOTE: About 10% of the time, your patient may have a neurological physical "stutter" with your patient's left foot. When your patient initiates your patient's left foot to step so he can stand up, your patient's left foot does a slight spasm and your patient can’t place it squarely on the floor. Your patient usually moves it back in place under your patient, and immediately tries again. The second time almost always works well and your patient stands up. This does not change anything you should do, except keep a steady hold and encourage your patient to try again.]
→ CAUTION: NEVER MOVE AWAY FROM YOUR PATIENT IN THE BATHROOM. NEVER LEAVE YOUR PATIENT ALONE IN THE BATHROOM. ←
→ CAUTION: When your patient is standing in the bathroom, always stand close enough to protect your patient from falling. If you have to reach for something or move sideways, then always keep at least one hand behind your patient. ←
→ CAUTION: Use the stance and positioning for removing briefs, pants, or summer shorts described above. ←
→ CAUTION: Use Safe Body Dynamics for all moves. ←
→ CAUTION: ! DO NOT flush the baby wipes ! Even if the wipes say "Flushable", do not flush any wipes; dispose of them in the waste basket. ←
[NOTE: Freshen your patient up either by Showering or through wiping with baby wipes and essential oils before getting your patient dressed.]
[NOTE: The toilet and toilet area will always need a thorough cleaning and disinfecting after this operation.]
Dwellness input from HPCA and family caregivers can serve to improve the ongoing support system. Feel free to speak up!